You may recall that I mentioned being inspired by a couple of dishes we enjoyed when last in Miami. Last week's post provided my version of a Meaty Ragu, so this week is my take of the other dish featuring salmon and fennel. I also figured that with the holidays approaching and New Year's Eve around the corner, this no cook, fast assemble appetizer might be helpful. It is an austere dish with just two stars but each one has its own strong identity.


Ingredients
Smoked Salmon
3 c fennel, shaved or sliced thinly
5 T rice wine vinegar
2 T sugar
3 T honey
1/2 t salt
Lemon Zest
Fennel Fronds for decorating the plate (optional)
Lemon slice for decorating the plate (optional)
Rye or Pumpernickel bread for serving (optional)

Instructions
Melt the honey and whisk together with the vinegar, sugar, salt. Add the shaved fennel and set aside to marinate and pickle for at least an hour.

Thin slivers of fennel. I love using a mandolin, but please watch your fingers!
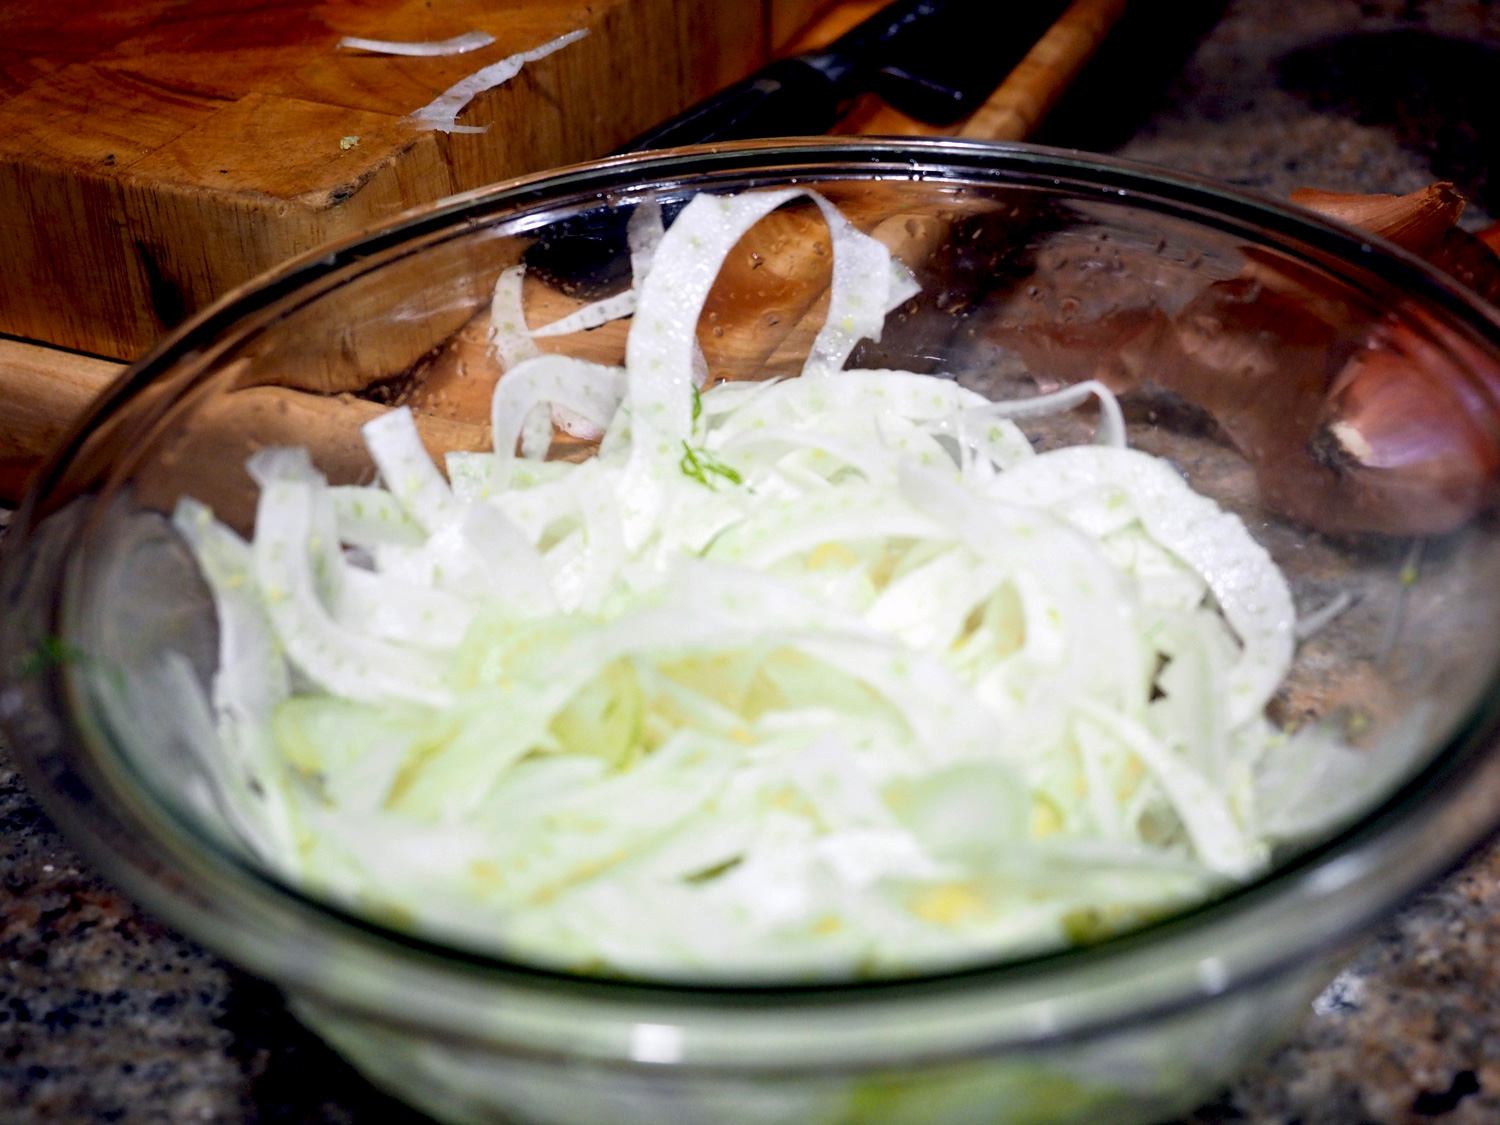
Fennel slices bathing in vinegar, sugar, salt and honey
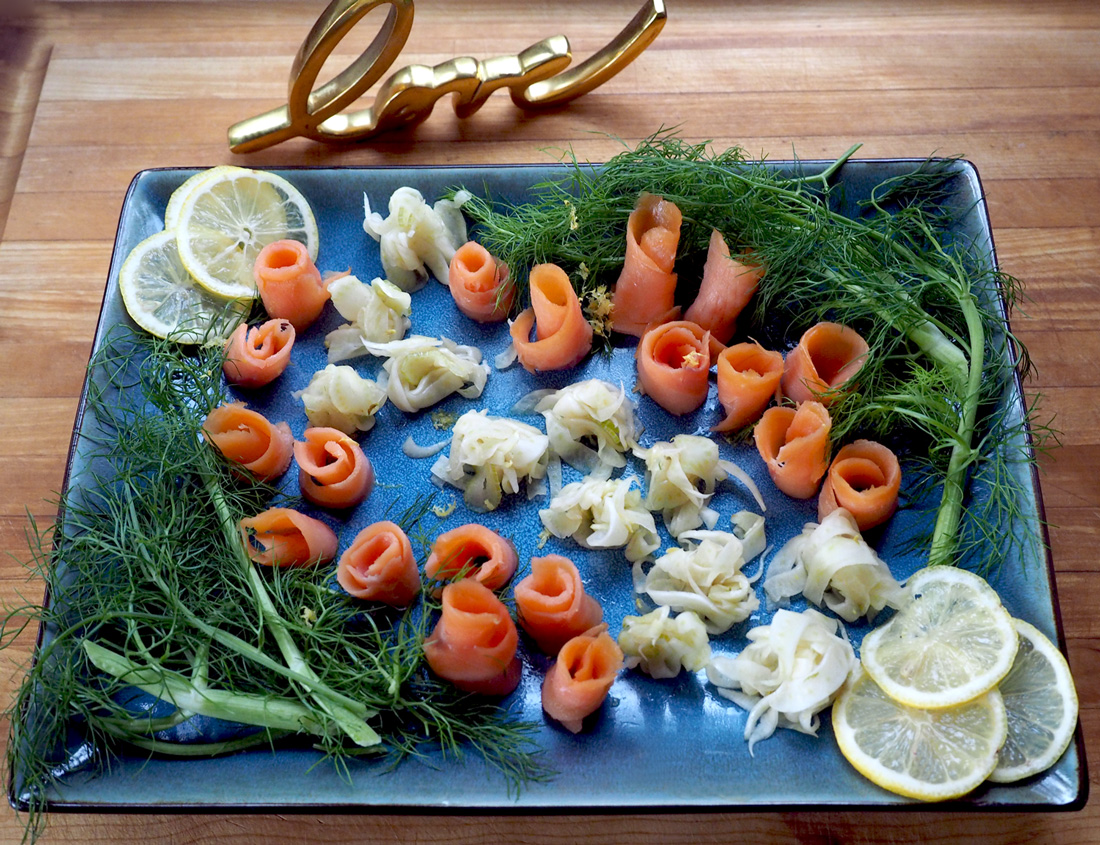
Once your fennel is pickled to your liking, you can begin to assemble your platter. This is one of those dishes that can be assembled ahead of your party and kept covered in the fridge until guests arrive. If you liked my idea of using the fennel fronds for color and decorating the platter, go ahead and place those as your base. Then roll up the salmon slices and arrange standing up. Gather up a bunch of the pickled fennel and tap with a paper towel to remove any excess liquid before placing on the platter. Arrange your plate any way you like. Finish by grating some lemon zest a top the entire platter. That is it. I told you it would be a no cook, easy app!

Design your platter any way you like. I like using the fennel fronds to decorate. It adds color and architectural elements.
Use a good smoked salmon, as it is the star of the show here. I would recommend having it hand cut in thin slices. Pickling the fennel really brings out the crunch and adds that acidic element which is balanced with honey so as to not overpower the salmon. This dish was part of a cocktail party. Knowing that the other plates on the buffet would provide hearty options I served this dish just as is, but had bread, crackers and endive on the buffet table. However, if you wanted to make this a more substantial plate or serve this as a first course, you could present it with some creme fraiche and pumpernickel or rye bread. I think that combination would be wonderful and perfect for a holiday party or New Year's Eve cocktail event.
Ideal for brunch, or as a starter to a dinner party. Hey if you are so inclined to have a party with pass around plates, this would fit that bill. Refreshing and light but bold with just two stars shining.